Sharon Brown
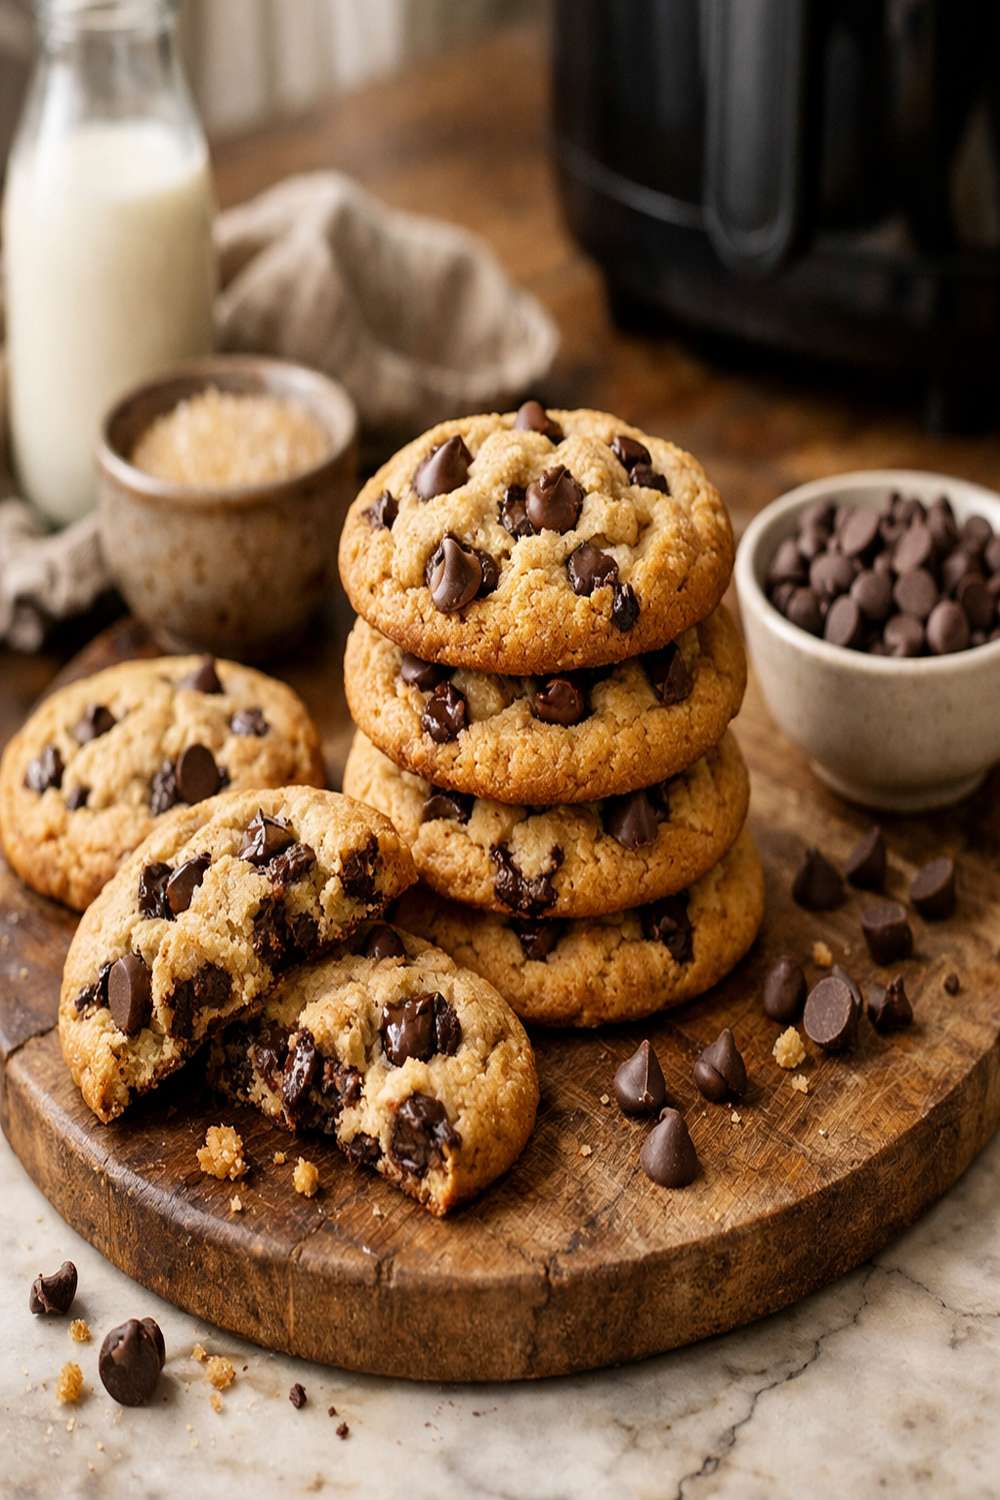
There’s something magical about warm chocolate chip cookies fresh from the kitchen. Whether you’re pairing them with a cold glass of milk or serving them alongside fresh banana strawberry juice, these air fryer cookies bring that soul-warming comfort we all crave. I’ve spent years helping families find shortcuts to homemade goodness, and this air fryer method is honestly a game-changer for busy schedules.
My Love Affair with Air Fryer Baking
I still remember the day my daughter came home from school with that classic assignment: bring homemade cookies for the class party. I was juggling three client consultations, meal prep for the week, and honestly, the thought of heating my Texas kitchen with a full oven in July made me want to cry.
That’s when I dusted off my air fryer—a kitchen gadget I’d been using mostly for veggie sides—and wondered if cookies were even possible. My first batch was a revelation. They came out with this perfect golden-brown exterior and a chewy center, all while keeping my kitchen cool and my stress levels down.
That moment changed how I approach weeknight baking. Now, whenever I need that homemade cookie magic fast, my air fryer is my trusted partner. I’ve tested this recipe dozens of times with families in my nutrition practice, and every single person asks for the method.
What is Air Fryer Chocolate Chip Cookie Recipe?
An air fryer chocolate chip cookie is a classic treat made with simple pantry staples—butter, sugars, eggs, flour, and chocolate—but baked using rapid air circulation instead of traditional oven heat. The magic happens because the air fryer’s intense heat creates that coveted crispy-chewy texture in about half the time of a conventional oven.
This method comes from modern kitchen efficiency, but the cookie itself is deeply rooted in American tradition. The chocolate chip cookie, perfected in the 1930s, has always been about accessible comfort. My air fryer version honors that legacy while making it practical for today’s busy households.
What makes mine special? I’ve stripped away any unnecessary complexity. No chilling overnight required (though you can if you want). No special equipment beyond what you likely already own. Just straightforward ingredients and a foolproof method that works every single time.
Why You’ll Love This Air Fryer Chocolate Chip Cookie Recipe
- Speed and convenience – These cookies bake in 5-7 minutes flat. That’s faster than running to the bakery and honestly rivals most drive-through treats. Plus, you know exactly what went into them.
- Perfect texture every time – The air fryer circulates heat so evenly that you get those crispy golden edges with a soft, chewy center. No more cookie roulette wondering if they’ll spread too thin or stay cake-like.
- Small-batch friendly – You can bake just 2-4 cookies at a time. This is perfect for portion control and means fresh cookies whenever the craving hits, not a dozen at once.
- Cool kitchen advantage – During those brutal Texas summers, I love that this method doesn’t heat up my whole home like a traditional oven. It’s literally just the air fryer basket doing the work.
- Less cleanup and energy use – A smaller appliance means easier cleanup and lower energy bills. Small wins that add up to real savings.
The Ingredients
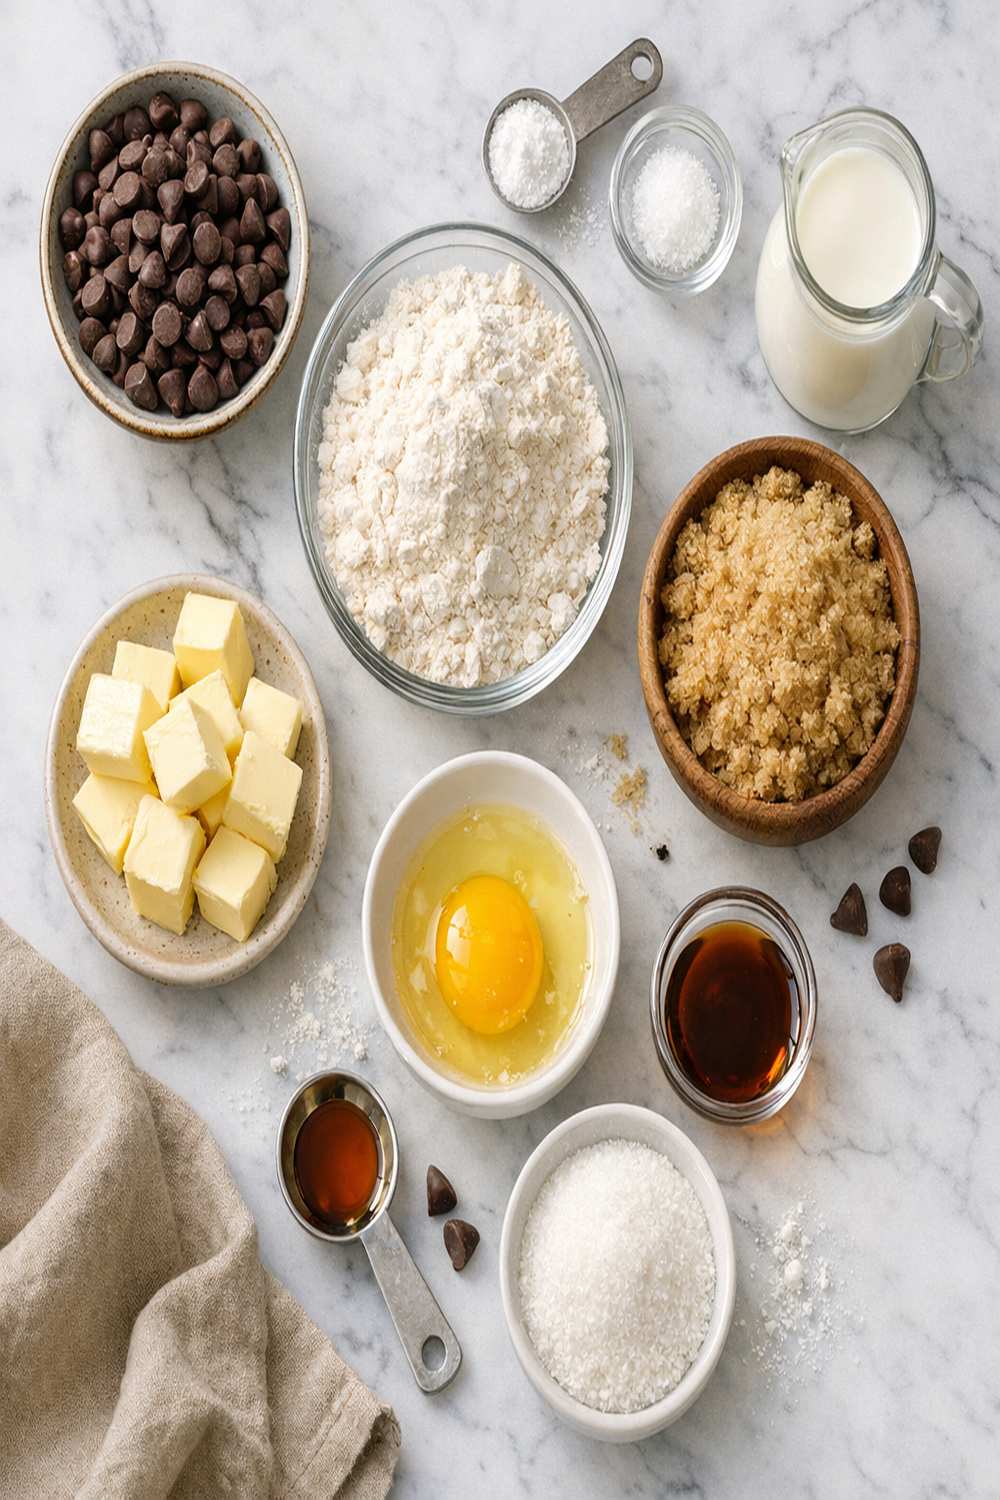
Making these cookies is all about quality basics. I’ve chosen each ingredient for a reason—some for texture, some for flavor, and all for that homemade taste that matters. These simple components work together to create something genuinely special. This recipe makes about 12-16 cookies depending on how generously you scoop.
- 1 cup all-purpose flour (spooned and leveled, never packed)
- 1 teaspoon baking soda (this creates the lift and ensures proper browning)
- ¾ cup semi-sweet chocolate chips (or dark chocolate if you prefer deeper flavor)
- ¼ teaspoon sea salt (balances sweetness and enhances chocolate flavor)
- 1 teaspoon pure vanilla extract (not imitation—it makes a real difference)
- ⅛ teaspoon ground cinnamon (optional but adds warmth and depth)
- 1 stick unsalted butter (melted and slightly cooled, about ½ cup)
- ¼ cup white granulated sugar (for crispness and spread)
- 1 large egg (room temperature works best for even mixing)
- ½ cup packed brown sugar (the moisture keeps cookies tender)
How to Make Air Fryer Chocolate Chip Cookies?
I’m going to walk you through this step by step. There’s nothing complicated here, and I promise the timing is something even baking novices can master. These instructions are based on hundreds of batches I’ve tested in my home kitchen and with families I counsel.
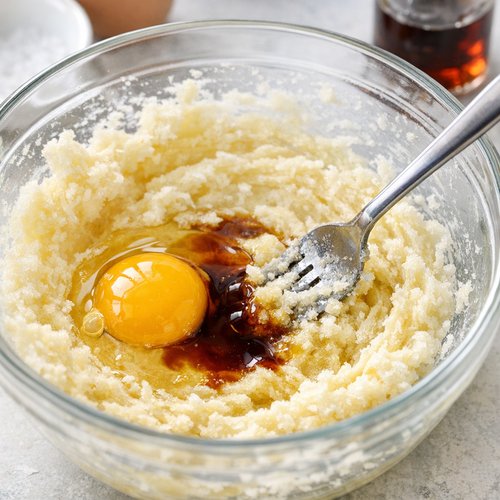
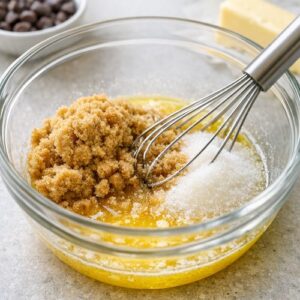
Step 1: Melt Your Butter and Combine with Sugars
Start by melting your butter in a microwave-safe bowl. I use 10-20 seconds on medium power—you want it just barely melted, not hot. This is important because overly hot butter will cook your egg when you add it.
Once melted, add both the brown sugar and white sugar directly to the warm butter. Using a fork or small whisk, beat these together until they’re fully combined and you don’t see any dry sugar granules. This should take about 30-45 seconds. The mixture will look slightly grainy and feel a bit thick, which is perfect.

Step 2: Add Your Egg and Vanilla
Crack your egg into the butter-sugar mixture and add your vanilla extract. Beat this combination with a fork for another 30 seconds until the egg is fully incorporated. You should see the mixture become lighter in color and slightly fluffy. Don’t worry if it looks a little separated at first—keep mixing and it will come together beautifully.
This is where I always pause for a moment. From a nutritional standpoint, that egg is bringing protein, choline for brain health, and lutein for eye protection—nutrients most homemade baked goods skip. It’s a small thing, but it matters.
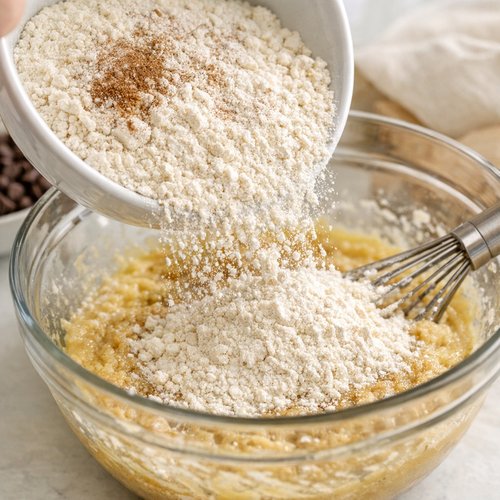
Step 3: Mix in Your Dry Ingredients
In a separate small bowl, whisk together your flour, baking soda, salt, and that optional cinnamon. Now pour this dry mixture into your wet ingredients and stir gently until just combined. You should see no streaks of flour anywhere, but don’t overmix. Overmixing develops too much gluten and makes cookies tough instead of tender.
This usually takes about 20-30 seconds of stirring with a wooden spoon or spatula. The dough will be thick and slightly sticky—exactly what you want.
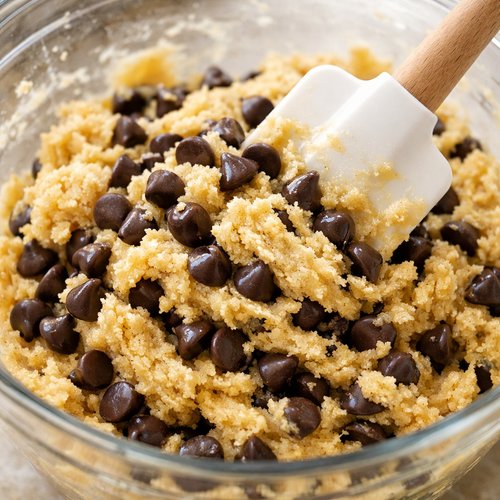
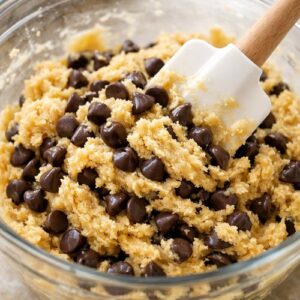
Step 4: Fold in Your Chocolate Chips
Gently fold your chocolate chips into the dough until they’re evenly distributed. I use a spatula for this because it’s gentler on the dough than a spoon. You should have chocolate in every bite, but avoid crushing the chips themselves.
At this point, you can refrigerate the dough for 30 minutes to overnight if you have time, or jump straight to baking. Cold dough spreads less and creates slightly thicker cookies, which some people prefer. I usually skip this step on weeknights because I’m eager for those fresh cookies, and the results are still fantastic.
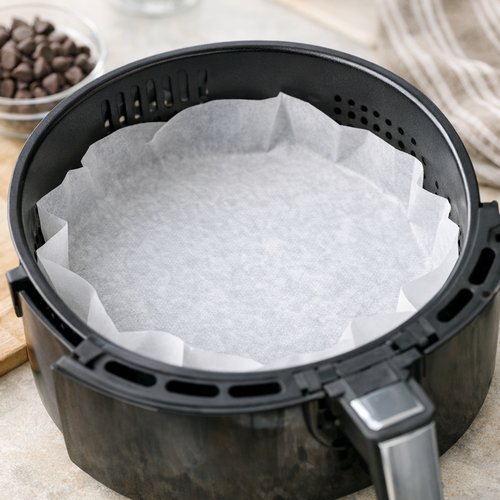
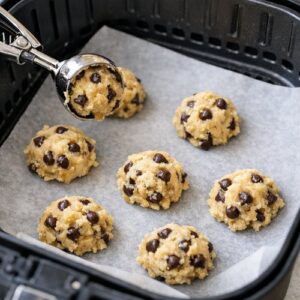
Step 5: Prepare Your Air Fryer
Line your air fryer rack or basket with parchment paper. This is non-negotiable in my kitchen because it prevents sticking and makes cleanup literally a one-second toss. Make sure your parchment fits snugly so it doesn’t blow around when the air circulation starts.
I preheat my air fryer to 325°F for about 3-5 minutes. This ensures even cooking throughout your batch. Some people skip preheating, and it’s okay, but I’ve found those extra minutes make a real difference in consistency.
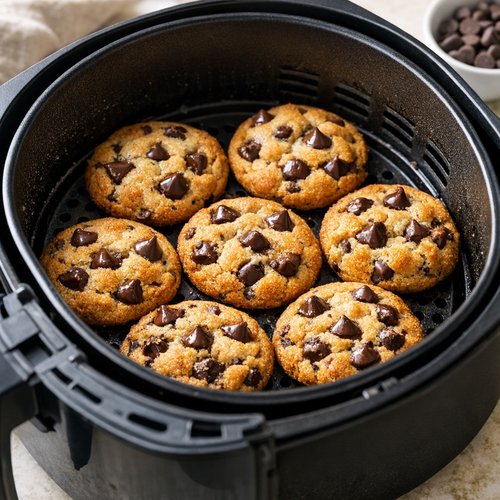
Step 6: Scoop and Arrange Your Cookies
Using a cookie scoop or tablespoon, drop 2-tablespoon-sized portions of dough onto your parchment-lined air fryer basket. Space them about 1.5 inches apart because they will spread slightly. Depending on your air fryer size, you should fit 2-4 cookies per batch. My smaller air fryer holds about three comfortably.
Don’t crowd them. I know the temptation is strong to bake more at once, but these cookies deserve personal space. Each cookie gets maximum heat circulation, which means maximum texture development.

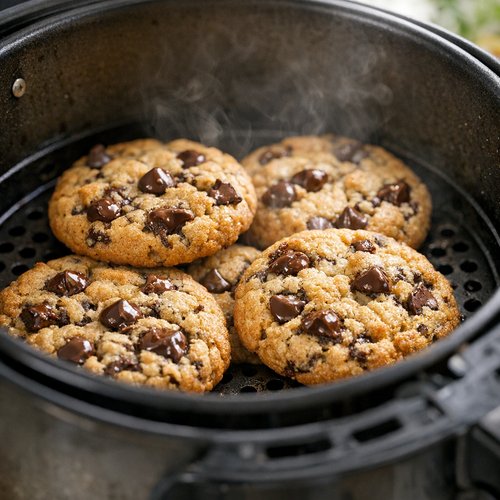
Step 7: Air Fry Until Golden
Set your air fryer to 325°F for 5-7 minutes. The exact time depends on your specific air fryer model and how many cookies you’re baking, so start checking at the 5-minute mark. You’re looking for cookies that are golden brown on the edges but still slightly soft in the center. The edges should look set and crispy, while the middle should jiggle just slightly if you gently shake the basket.
When they’re done, you’ll smell that unmistakable chocolate aroma filling your kitchen. It’s honestly one of my favorite moments in the whole process.
Step 8: Rest and Cool
This step is crucial and one that many people skip. Leave your cookies in the air fryer for 2-3 minutes after turning it off. They’ll continue cooking slightly from residual heat, and this resting period firms them up just enough to handle without falling apart, while maintaining that chewy center.
After resting, carefully remove them with a spatula and place them on a cooling rack or plate. They’ll firm up more as they cool, reaching that perfect texture in about 10-15 minutes. I promise they’re worth the wait, though I’ll admit I’ve definitely eaten a few while they’re still warm.
Tips and Tricks
- Use room-temperature eggs – Cold eggs won’t incorporate smoothly into your butter mixture. I keep mine on the counter for 15 minutes before baking, or you can place them in warm water for 5 minutes.
- Don’t skip the parchment paper – It’s not just about cleanup. It also prevents the bottoms from browning too quickly before the insides cook through.
- Invest in a cookie scoop – This $5-10 tool changed my baking life. It ensures every cookie is the same size, so they all cook at the same rate. Consistency is everything.
- Test your air fryer temperature – Air fryers vary wildly in actual temperature. If your first batch burns, lower the heat by 10-15 degrees next time. If they’re underdone, raise it by the same amount.
- Make cookie dough ahead – Scoop your dough into balls and freeze them on a sheet pan. Once frozen solid, transfer to a freezer bag and bake directly from frozen, adding just 1-2 extra minutes of cooking time. Weekend baking just became ridiculously easy.
- Layer chocolate types – Mix semi-sweet and dark chocolate chips for more complex flavor. Or add white chocolate for something different. The ratio stays the same, just the flavor profile changes.
Can I Store Air Fryer Chocolate Chip Cookies?
Yes, and I’m so glad you asked because storage makes these cookies even more practical. Cooled cookies can be stored in an airtight container at room temperature for up to 5 days. I like to place parchment between layers so they don’t stick together.
For longer storage, you can freeze baked cookies in a freezer-safe container for up to 2 months. Just thaw them at room temperature for about 30 minutes before eating. The flavor stays fresh and the texture remains perfect.
If you want to store unbaked dough, refrigerate it in an airtight container for up to 3 days or freeze for up to 3 months. Frozen dough can go straight into the air fryer—just add 1-2 minutes to your cooking time.
Expert’s Nutritional Insight
Here’s something I always share with my clients: these cookies aren’t “health food,” but they’re not nutritional villains either. The real advantage of homemade cookies is control. Store-bought versions often contain hydrogenated oils, artificial vanillin, and mysterious ingredients you can’t pronounce.
Your homemade version has real butter (with beneficial butyric acid), real vanilla (which supports cognitive function), and actual chocolate with polyphenols. The egg adds choline for brain health. When you factor in portion control—eating one perfect cookie instead of three mediocre ones from a package—the nutritional picture improves significantly.
I tell families: homemade treats, eaten mindfully and in reasonable portions, are part of a balanced lifestyle. These cookies are meant to be savored, not mindlessly consumed. That’s the real nutritional win.
Make-Ahead Guide
One of my favorite advantages of this recipe is how beautifully it plays with your meal-prep lifestyle. Here’s my detailed approach based on years of helping busy families:
Sunday Prep Strategy: Make a full batch of dough on Sunday evening. Scoop all portions onto a sheet pan lined with parchment paper. Freeze until solid (about 2 hours), then transfer to a labeled freezer bag. Throughout the week, whenever you need cookies, bake 2-4 frozen portions directly from the freezer at 325°F for 6-8 minutes.
Partial Batch Approach: If freezing isn’t your style, keep your dough in a covered bowl in the refrigerator. It stays fresh for 3 days, and you can bake just 2-3 cookies whenever the mood strikes. This is my personal approach because I love the ritual of small-batch baking.
Baked Cookie Storage: Make a full batch on your prep day and store cooled cookies in an airtight container. They stay fresh for 5 days and are perfect for grabbing alongside morning coffee or a midday snack.
Common Mistakes to Avoid
- Overheating your butter – If butter is too hot when you add the egg, you’ll end up with scrambled eggs in your dough. Keep it just melted and slightly cooled. This is the #1 mistake I see.
- Overmixing the dough – After adding flour, stir just until combined. The moment you stop seeing flour streaks, you’re done. Overmixing makes tough cookies instead of tender ones.
- Skipping the cooling period – I know those warm cookies smell incredible, but they’re structurally fragile right out of the air fryer. Those 2-3 minutes in the basket are non-negotiable if you want cookies that hold together.
- Crowding the air fryer – Fitting more cookies means uneven cooking. Stick with 2-4 cookies per batch. Your patience will pay off in perfectly cooked cookies.
Nutrition Information
Based on USDA nutrition databases, one cookie (approximately 1 ounce) contains roughly 120-140 calories, with 6-7g of fat, 16-18g of carbohydrates, 1-2g of protein, and 12-13g of sugar. The exact numbers vary slightly based on your specific ingredient brands and how generously you scoop.
What I love about this recipe is the ingredient transparency. No trans fats, no artificial anything. The fat comes from real butter (containing fat-soluble vitamins A, D, E, and K), and the carbohydrates include both simple sugars and complex carbs from flour. The egg provides choline, selenium, and complete protein.
For portion control context, one or two cookies with a glass of milk or cup of tea makes a satisfying treat. The combination of fat, carbs, and protein creates satiety that keeps you satisfied longer than you’d expect from a single cookie.
What Can I Serve With Air Fryer Chocolate Chip Cookies?
These cookies shine as a standalone treat, but they also pair beautifully with other recipes. The chocolate flavor is versatile and complements both light and rich accompaniments. Think about texture contrast—soft cookies alongside something crisp, or warm cookies with something cold and refreshing.
For a light refresh, serve alongside a glass of banana strawberry juice, which provides natural sweetness and brightness that balances the richness perfectly. For entertaining, you might pair them with balsamic bruschetta as part of a dessert and appetizer spread—the savory-sweet contrast is sophisticated and memorable.
- Cold milk or iced coffee – The classic pairing because the cold beverage cuts through the cookie’s richness while the tannins in coffee enhance chocolate flavor.
- Hot tea or hot chocolate – Perfect for cooler months. Chamomile or peppermint tea adds a sophisticated note, while hot chocolate creates an indulgent moment.
- Fresh fruit – Sliced strawberries or raspberries provide acidic brightness that balances chocolate sweetness beautifully.
- Whipped cream or vanilla ice cream – Warm cookie with cold ice cream is textural perfection. Allow the cookie to cool just slightly first so the ice cream melts into those crevices.
Substitutes
- Different chocolate chips – Swap semi-sweet for dark chocolate (more sophisticated), milk chocolate (sweeter), or white chocolate (completely different flavor profile). Use the same amount, just adjust sweetness expectations.
- Nut additions – Add chopped pecans, walnuts, or macadamia nuts (about ½ cup) for texture and nutrition. Reduce chocolate chips slightly to maintain balance.
- Brown butter alternative – For deeper, more complex flavor, brown your butter in a saucepan over medium heat for 5-7 minutes until it’s golden and nutty-smelling. Cool completely before using. This elevates the recipe significantly.
- Alternative sweeteners – For controlled sugar intake, substitute white sugar with coconut sugar (same amount) for caramel notes, or use a combination of white sugar and monk fruit sweetener (reduce monk fruit slightly as it’s sweeter than sugar).
- Gluten-free flour blend – Use a quality 1:1 gluten-free flour blend to make these cookies accessible to more people. The texture will be very slightly different but still delicious.
Seasonal Variations
One of the joys of this recipe is how adaptable it is to different seasons and cravings. As a registered dietitian, I love how seasonal variations naturally evolve with ingredient availability and our bodies’ needs.
Spring and Summer: Add the zest of one lemon to your dough for brightness, and substitute half the semi-sweet chocolate chips with white chocolate. This version feels lighter and more refreshing in warm weather. You could also add a pinch of cardamom (⅛ teaspoon) for exotic warmth.
Fall and Winter: Increase your cinnamon to ½ teaspoon, add a pinch of nutmeg and ginger, and add ⅓ cup of chopped pecans. Maybe swap some chocolate chips for dark chocolate for deeper richness. These spiced versions feel cozy and grounding.
Holiday Special Version: Add peppermint extract (½ teaspoon) and crushed candy canes instead of some chocolate chips. Or try dried cranberries mixed with white chocolate for festive color and tart contrast.

Air Fryer Chocolate Chip Cookie Recipe
Ingredients
- 1 cup all-purpose flour spooned and leveled, never packed
- 1 teaspoon baking soda this creates the lift and ensures proper browning
- ¾ cup semi-sweet chocolate chips or dark chocolate if you prefer deeper flavor
- ¼ teaspoon sea salt balances sweetness and enhances chocolate flavor
- 1 teaspoon pure vanilla extract (not imitation
- ⅛ teaspoon ground cinnamon optional but adds warmth and depth
- 1 stick unsalted butter melted and slightly cooled, about ½ cup
- ¼ cup white granulated sugar for crispness and spread
- 1 large egg room temperature works best for even mixing
- ½ cup packed brown sugar the moisture keeps cookies tender
Instructions
Step 1: Melt Your Butter and Combine with Sugars
- Start by melting your butter in a microwave-safe bowl. I use 10-20 seconds on medium power—you want it just barely melted, not hot. This is important because overly hot butter will cook your egg when you add it. Once melted, add both the brown sugar and white sugar directly to the warm butter. Using a fork or small whisk, beat these together until they're fully combined and you don't see any dry sugar granules. This should take about 30-45 seconds. The mixture will look slightly grainy and feel a bit thick, which is perfect.
Step 2: Add Your Egg and Vanilla
- Crack your egg into the butter-sugar mixture and add your vanilla extract. Beat this combination with a fork for another 30 seconds until the egg is fully incorporated. You should see the mixture become lighter in color and slightly fluffy. Don't worry if it looks a little separated at first—keep mixing and it will come together beautifully. This is where I always pause for a moment. From a nutritional standpoint, that egg is bringing protein, choline for brain health, and lutein for eye protection—nutrients most homemade baked goods skip. It's a small thing, but it matters.

Step 3: Mix in Your Dry Ingredients
- In a separate small bowl, whisk together your flour, baking soda, salt, and that optional cinnamon. Now pour this dry mixture into your wet ingredients and stir gently until just combined. You should see no streaks of flour anywhere, but don't overmix. Overmixing develops too much gluten and makes cookies tough instead of tender. This usually takes about 20-30 seconds of stirring with a wooden spoon or spatula. The dough will be thick and slightly sticky—exactly what you want.

Step 4: Fold in Your Chocolate Chips
- Gently fold your chocolate chips into the dough until they're evenly distributed. I use a spatula for this because it's gentler on the dough than a spoon. You should have chocolate in every bite, but avoid crushing the chips themselves. At this point, you can refrigerate the dough for 30 minutes to overnight if you have time, or jump straight to baking. Cold dough spreads less and creates slightly thicker cookies, which some people prefer. I usually skip this step on weeknights because I'm eager for those fresh cookies, and the results are still fantastic.
Step 5: Prepare Your Air Fryer
- Line your air fryer rack or basket with parchment paper. This is non-negotiable in my kitchen because it prevents sticking and makes cleanup literally a one-second toss. Make sure your parchment fits snugly so it doesn't blow around when the air circulation starts. I preheat my air fryer to 325°F for about 3-5 minutes. This ensures even cooking throughout your batch. Some people skip preheating, and it's okay, but I've found those extra minutes make a real difference in consistency.

Step 6: Scoop and Arrange Your Cookies
- Using a cookie scoop or tablespoon, drop 2-tablespoon-sized portions of dough onto your parchment-lined air fryer basket. Space them about 1.5 inches apart because they will spread slightly. Depending on your air fryer size, you should fit 2-4 cookies per batch. My smaller air fryer holds about three comfortably. Don't crowd them. I know the temptation is strong to bake more at once, but these cookies deserve personal space. Each cookie gets maximum heat circulation, which means maximum texture development.
Step 7: Air Fry Until Golden
- Set your air fryer to 325°F for 5-7 minutes. The exact time depends on your specific air fryer model and how many cookies you're baking, so start checking at the 5-minute mark. You're looking for cookies that are golden brown on the edges but still slightly soft in the center. The edges should look set and crispy, while the middle should jiggle just slightly if you gently shake the basket. When they're done, you'll smell that unmistakable chocolate aroma filling your kitchen. It's honestly one of my favorite moments in the whole process.

Step 8: Rest and Cool
- This step is crucial and one that many people skip. Leave your cookies in the air fryer for 2-3 minutes after turning it off. They'll continue cooking slightly from residual heat, and this resting period firms them up just enough to handle without falling apart, while maintaining that chewy center. After resting, carefully remove them with a spatula and place them on a cooling rack or plate. They'll firm up more as they cool, reaching that perfect texture in about 10-15 minutes. I promise they're worth the wait, though I'll admit I've definitely eaten a few while they're still warm.

Notes
Nutrition
FAQs
Can I make these cookies without an air fryer?
Absolutely. Bake them in a traditional oven at 350°F for 9-11 minutes on a parchment-lined baking sheet. The results will be slightly different—they may spread a bit more and take longer—but they’ll still be delicious. The air fryer’s advantage is speed and consistent texture, but traditional ovens absolutely work. Just watch them closely since oven temperatures vary significantly.
Why are my cookies spreading too thin?
This usually comes from one of three things: your butter was too soft or warm when you started, you didn’t use enough flour, or your air fryer temperature is running cool. Try refrigerating your dough for 30 minutes before baking, measure your flour correctly (spoon and level, don’t pack), and consider testing your air fryer temperature with an oven thermometer if spreading persists.
Can I double this recipe?
Yes, you can double all the ingredients. Just mix the dough in a larger bowl and bake in multiple batches since air fryers have size limitations. I don’t recommend baking the entire batch at once because cookies need proper spacing for even cooking. Doubling is perfect for meal prep when you want multiple batches of cookies throughout the week.
What’s the difference between baking soda and baking powder?
Great question. Baking soda is a base that needs an acid to activate (in this case, the brown sugar’s acidity), while baking powder contains both the base and acid already mixed. This recipe uses baking soda specifically because the brown sugar provides that activation. They’re not interchangeable in this recipe.
Why does my recipe call for both brown and white sugar?
The brown sugar brings moisture and chewiness (from molasses content), while white sugar promotes spread and crispness. Together, they create that perfect balance of crispy edges and chewy centers. Using only one type would change the texture significantly. Brown sugar alone makes cakey cookies; white sugar alone makes thin, snappy ones.
More Recipes You’ll Love
- Apple Pie Recipe Eggless – A delicious fruit-forward dessert that works beautifully in an air fryer for quick baking
- BBQ Cauliflower Recipe – If you love air fryer cooking, this savory option shows the appliance’s versatility
- Agar Marshmallow Recipe – A fun homemade treat that pairs perfectly with these cookies
Final Thoughts
These air fryer chocolate chip cookies have genuinely changed how I approach weeknight baking. They’re fast enough for a Tuesday craving, simple enough for a beginner baker, and flexible enough to adapt to whatever chocolate and seasonings you love. Most importantly, they’re absolutely delicious.
I think back to my daughter’s school party and smile. Those cookies she brought from my air fryer? Everyone asked for the recipe. Not because they were fancy or complicated, but because they were real, homemade, and made with care. That’s what it’s all about—bringing people together with food that nourishes both body and soul.
The next time you need comfort in a quick form, or you want to fill your home with that warm, welcoming aroma of baking, give these a try. Your kitchen, your schedule, and your taste buds will thank you.
Happy Cooking!