Content Editor
There’s something magical about roasted garlic. The way it transforms into a rich, buttery delight can elevate even the simplest dish. I love tossing roasted garlic into pasta dishes, slathering it onto warm, crusty bread, or using it to make a killer aioli.
With a hint of sweetness and so much depth of flavor, it becomes a must-have condiment in my kitchen. And let’s be real: if you’re anything like me, the air fryer is your new best friend, turning cooking into a breeze.

Roasted garlic is a classic that brings complexity to a variety of dishes. Prepare to have your taste buds awaken, because air frying it is not only speedy but results in perfectly happy garlic cloves.
You can use this versatile ingredient in pasta, dips, or smeared onto fresh bread, making it an ideal addition to your meals. And I must say, the method here is super straightforward, keeping your kitchen relatively mess-free while providing incredible flavor.
You Might Like These Recipes!
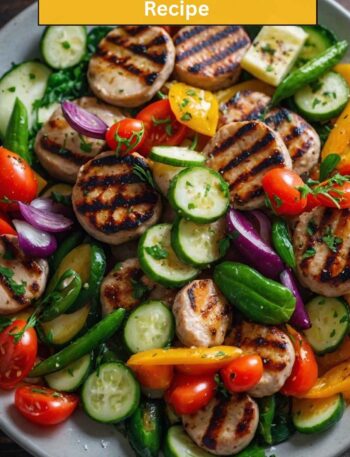
Grilled Chicken Sausages And Summer Vegetables
How I Have Used the Ingredients in This Recipe
In this recipe, you’ll come across simple yet crucial ingredients: a whole garlic bulb, a dash of olive oil, and a sprinkle of salt. These staple items pack a flavor punch while remaining easy to work with. The beauty of roasted garlic lies in how well the flavors mellow and mingle together, transforming the bulbs from sharp and pungent to smooth and nutty. With a bit of olive oil to help with even cooking and a hint of salt to enhance everything, you’re set for success.
The Ingredients

– 1 whole garlic bulb
– 1 tablespoon of high-quality olive oil
– 1 teaspoon sea salt (optional)
– 1 teaspoon fresh thyme leaves (optional for an herbaceous twist)
Ingredients From : tastyoven.com
How to Make Air Fryer Roasted Garlic Recipe
Now, let’s dive into the fun part! Making roasted garlic in the air fryer is quick and straightforward, allowing you to enjoy the results in about half an hour. You’ll be amazed at how easy it is to get delicious roasted garlic by following these simple steps.
Step-by-Step Directions
Step 1: Prepare the Garlic Bulb

To start, take your garlic bulb and leave it as a whole piece. With a sharp knife, cut off the bottom side—the one that has the brown roots. This step exposes the lovely cloves inside while helping them roast evenly.
Step 2: Wrap it Up

Lay your cut garlic bulb in a decent-sized piece of aluminum foil. I like to make sure it’s big enough to wrap around the bulb snugly. Next, drizzle a tablespoon of olive oil over the exposed cloves, ensuring they are well coated. Don’t be shy with it; let some oil run down the sides of the garlic bulb too. Wrap the bulb tightly in the foil, creating a little packet to hold the moisture in while it cooks.
Step 3: Air Fry to Perfection

Set your air fryer to 390°F (198°C). Once it’s preheated, pop the wrapped garlic into the air fryer basket or cooking pan. Cook it for 20 to 25 minutes; you’ll know it’s done when the garlic turns golden brown and soft. If you’re like me, you’ll find yourself eagerly peeking in that air fryer during those last few minutes.
Step 4: Get Ready to Enjoy

Carefully take the garlic out of the air fryer using oven mitts and tongs—safety first! Allow it to cool for a minute, and then gently squeeze the bulb. The roasted cloves should slide right out, ready to whisk you away to flavor town.
Recipe Notes
– Use Fresh Garlic: Fresh garlic will roast better and taste sweeter. Check for firm bulbs without any sprouting.
– Experiment with Olive Oil: You can try flavored olive oil, such as garlic-infused, to enhance the taste even more.
– Adjust Cooking Time: Depending on your air fryer model, cooking times can vary, so keep an eye on your garlic towards the end.
– Use a Garlic Keeper: Storing your garlic properly will keep it fresh longer. A garlic keeper with holes allows air circulation, preventing rot.
– Don’t Skip the Salt: Adding salt is optional but recommended as it draws out the natural flavors.
Storage Tips
If you have leftover roasted garlic (good luck with that!), you can store it in an airtight container in the fridge for up to a week. Just keep in mind that as it sits, the flavor may intensify. You can also freeze roasted garlic in ice cube trays. Once frozen, pop the cubes out and transfer them to a freezer bag for a quick flavor boost in future dishes.
Serving Suggestions
– Pasta Dishes: Mix roasted garlic into your favorite pasta for a creamy, flavorful sauce.
– Garlic Bread: Spread the roasted garlic on bread before toasting for a perfect appetizer.
– dips: Blend roasted garlic with cream cheese for a savory dip that’s perfect with crackers!
– Salads: Add to roasted vegetables for a flavor kick or toss throughout your salad.
– Mashed Potatoes: Stir into mashed potatoes for a deliciously creamy and savory twist.
What Other Substitute Can I Use in Air Fryer Roasted Garlic Recipe?
– Shallots: These will roast similarly and provide a sweet, mild onion flavor.
– Caramelized Onions: Grab some caramelized onions for a rich sweetness.
– Roasted Peppers: Use jarred roasted peppers to give an added depth of flavor.
– Herb Spices: Fresh herbs such as rosemary or parsley can be added for additional zest.
– Sweet Potatoes: Try roasting a sweet potato along with garlic for a sweet-savory combo.

Air Fryer Roasted Garlic Recipe
Equipment
- Air fryer
- aluminum foil
- tongs
Ingredients
- – 1 whole garlic bulb
- – 1 tablespoon of high-quality olive oil
- – 1 teaspoon sea salt optional
- – 1 teaspoon fresh thyme leaves optional for an herbaceous twist
Instructions
Step 1: Prepare the Garlic Bulb
- To start, take your garlic bulb and leave it as a whole piece. With a sharp knife, cut off the bottom side—the one that has the brown roots. This step exposes the lovely cloves inside while helping them roast evenly.
Step 2: Wrap it Up
- Lay your cut garlic bulb in a decent-sized piece of aluminum foil. I like to make sure it’s big enough to wrap around the bulb snugly. Next, drizzle a tablespoon of olive oil over the exposed cloves, ensuring they are well coated. Don’t be shy with it; let some oil run down the sides of the garlic bulb too. Wrap the bulb tightly in the foil, creating a little packet to hold the moisture in while it cooks.
Step 3: Air Fry to Perfection
- Set your air fryer to 390°F (198°C). Once it’s preheated, pop the wrapped garlic into the air fryer basket or cooking pan. Cook it for 20 to 25 minutes; you’ll know it’s done when the garlic turns golden brown and soft. If you’re like me, you’ll find yourself eagerly peeking in that air fryer during those last few minutes.
Step 4: Get Ready to Enjoy
- Carefully take the garlic out of the air fryer using oven mitts and tongs—safety first! Allow it to cool for a minute, and then gently squeeze the bulb. The roasted cloves should slide right out, ready to whisk you away to flavor town.
Notes
Nutrition
FAQs
1. Can I roast two bulbs of garlic in the air fryer at the same time?
Yes, as long as they fit comfortably in the air fryer basket without overcrowding. Adjust the cooking time if needed, so they roast evenly.
2. How can I use roasted garlic in my everyday cooking?
Blend it into sauces, spread on sandwiches, mix into mashed potatoes, or toss in with vegetables before roasting for added flavor.
3. How can I make roasted garlic without an air fryer?
Roasting garlic can also be done in the oven. Wrap it in foil and bake at 400°F (200°C) for around 30-35 minutes.
4. Can I roast garlic without oil?
While oil helps in the cooking process and adds moisture, garlic can still be roasted in its foil without it. It may not be as rich, though.
5. What are some health benefits of roasted garlic?
Roasted garlic offers heart health benefits, can boost the immune system, and is high in antioxidants, making it a nutritious addition to your diet.
Conclusion
Air fryer roasted garlic is a game-changer in terms of flavor and ease. It adds depth to any meal and might just become your pantry’s best friend. Whether you’re tossing it into pasta, slathering it on bread, or mixing it into dips, the use of roasted garlic can elevate your dishes and impress your friends. This simple method makes it easy for anyone to bring home those beautiful roasted flavors without hours in the kitchen.
I hope you enjoy roasting your garlic as much as I do—happy cooking!