Content Editor
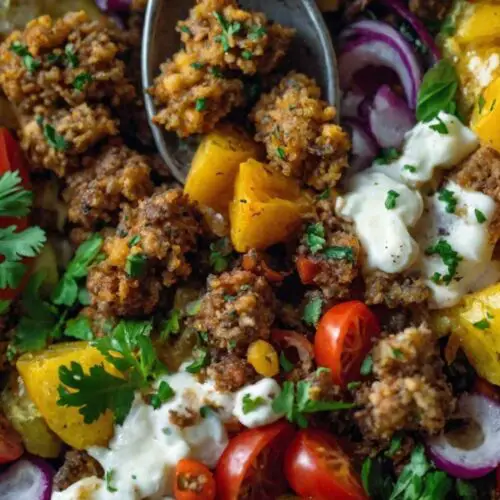
When it comes to enjoying hippie hash, the choices are vibrant and delightful. Consider pairing your dish with fresh, sliced avocado for that creamy texture that complements the crispy edges of the hash.
A dollop of Greek yogurt adds tanginess and richness, enhancing the overall experience. If you’re feeling adventurous, serve it alongside a zesty cucumber salad or even grilled veggies to add layers of flavor. And let’s not forget about a refreshing drink—serve it with a chilled, citrus-infused iced tea. Trust me; the combination will elevate your meal.
Introduction: Why We’ve Fallen for Hippie Hash

You’ll Also Like These Recipes
You know that feeling when your fridge is bursting with fresh veggies, and you want to whip up something that feels both nourishing and comforting?
That’s where hippie hash comes in. Imagine cozying up to a bowl of crispy, golden goodness, packed with all the vibrant colors nature has to offer—it’s a feast for the eyes and the taste buds. And who doesn’t love a meal that feels indulgent while sneaking in a healthy kick?
I stumbled upon this simple yet satisfying dish during a weekend brunch gathering with friends. A few ingredients on hand, a dash of creativity, and suddenly I was diving into a plate that almost felt too good to be true. Spoiler alert: it wasn’t! As it turns out, hippie hash is the perfect blend of nutrition, flavor, and ease. So, let’s dig deeper into what exactly makes this dish so irresistible!
What is Hippie Hash?
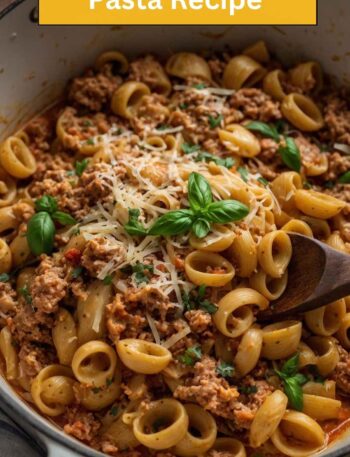
Hippie hash, at its core, is a delightful medley of vegetables and crispy potatoes, often seasoned with herbs and spices. It’s a plant-forward meal that celebrates wholesome ingredients.
This dish might remind you of a traditional breakfast hash but dodges the heavy meats and dairy. Instead, it embraces colorful veggies like bell peppers, onions, and zucchini while offering options for customization.
The best part? It’s endlessly adaptable; almost any vegetable can find its way into the mix. Think of it as a vehicle for whatever leftover vegetables you need to use up or whatever’s fresh at your local farmers’ market. Even better, it’s vegan and gluten-free, making it a universal favorite.
What is the Flavor Profile of this Dish?
Hippie hash delivers a fantastic blend of flavors to your palate. The crispy hash browns, when perfectly sautéed, create a nutty, crunchy base. The bell peppers bring a hint of sweetness, while the onions add a savory depth.
The addition of broccoli and zucchini contributes a fresh, green vibrancy. Nutritional yeast adds a cheesy, umami flavor that surprises and delights. Each spice, from the oregano to the optional crushed red pepper flakes, brings a layer of warmth, tying the entire dish together. Every bite is a celebration of taste and texture, delivering a joyful crunch amidst the beautifully sautéed veggies.
Why You’ll Love This Dish
- Easy to Prepare: You can have it ready in no time! With straightforward steps and minimal kitchen equipment, hippie hash is a hassle-free recipe.
- Customizable: Use whatever vegetables you have on hand. This dish embraces creativity.
- Healthful: Packed with nutrients, it’s a great way to sneak in your daily veggies.
- Versatile: Enjoy it for breakfast, lunch, or dinner; it really knows no bounds.
- Total Crowd-Pleaser: Even picky eaters in your life will be charmed by this hearty dish.
Ingredients
Here’s what you will need to create your very own hippie hash:
- 1 lb. frozen shredded hash browns, thawed
- 1 medium red onion, thinly sliced
- 1 red bell pepper, diced
- 1 small zucchini, chopped
- 2 cups bite-sized broccoli florets
- 1 cup button mushrooms, thinly sliced
- 2 cloves fresh garlic, finely minced
- 1 tbsp nutritional yeast
- 1 tbsp extra virgin olive oil
- 1/4 tsp crushed red pepper flakes (optional)
- 1/2 tsp dried oregano
- Salt and freshly cracked black pepper, to taste
- 1 cup reduced-fat feta cheese, crumbled (or dairy-free cheese for a vegan option)

Step-by-Step Instructions
Step 1: Prep Your Ingredients
Start by gathering all your ingredients. Chop them up and set them aside. Thaw your hash browns, and make sure they are as dry as possible to get that perfect crunch.
Step 2: Heat the Pan
In a large skillet, heat the extra virgin olive oil over medium heat. Wait for it to shimmer just a bit—that’s a sign it’s hot enough.
Step 3: Sauté the Aromatics
Add the minced garlic and sliced onions to the hot oil. Sauté for about 3-4 minutes until the onions turn translucent and the garlic is fragrant. Keep stirring to prevent the garlic from burning.
Step 4: Add the Vegetables
Next, toss in the diced bell pepper, chopped zucchini, and sliced mushrooms. Cook for another 5-7 minutes. You’re looking for those veggies to soften but still keep some texture.
Step 5: Add Hash Browns
Time to introduce your thawed hash browns. Spread them evenly across the skillet and allow them to cook undisturbed for about 5 minutes. This helps form that crispy layer we all crave.
Step 6: Mix in Broccoli and Season
Add the bite-sized broccoli florets. Stir everything together. At this point, sprinkle in your nutritional yeast, oregano, and crushed red pepper flakes if you’re using them. Season with salt and pepper.
Step 7: Cook to Crispy Perfection
Let it cook for another 5-10 minutes, stirring occasionally, until the hash browns are golden brown and crispy. Make sure that every veggie is integrated well.
Step 8: Serve and Top
Once golden, remove from heat. Give it a taste; adjust your seasonings if necessary. Serve hot, topping it with crumbled feta cheese or your cheese of choice, and enjoy!
Tips & Tricks
- Frozen Hash Browns: If you forgot to thaw them, don’t worry! Just add a few minutes to the cooking time.
- Sheet Pan Option: Want an even easier cleanup? Toss everything on a sheet pan and roast in a hot oven for about 20 minutes.
- Freezing: If you make too much, you can freeze the leftovers. Just store them in an airtight container.
- Fresh Herbs: Add a handful of fresh herbs like parsley or basil right before serving for an extra burst of flavor.
- Leftover Stars: This dish shines with leftovers. Add cooked chicken or sausage if desired for a heartier meal.
Nutrition Information
One serving of hippie hash (about one half cup) is loaded with nutrients:
- Calories: Approximately 250
- Protein: 8g
- Carbohydrates: 35g
- Fat: 10g
- Fiber: 5g
- Sodium: Varies depending on added salt
How Can You Store This Hippie Hash?
After enjoying your hippie hash, store the leftovers in an airtight container placed in the refrigerator. This hearty dish can last up to 4 days. When you’re ready to enjoy it again, just reheat in the microwave or on the stovetop until warmed through. For longer storage, consider freezing it in portions for up to three months.

Alternatives If You’re Missing Ingredients
- Dairy-Free Cheese: If you can’t find feta, try using almond or cashew cream cheese for that rich flavor.
- Potato Substitute: If you’re out of frozen hash browns, diced sweet potatoes make a wonderful alternative that adds a sweet note.
- Leafy Greens: No broccoli at hand? Spinach or kale can be tossed in at the end for a similar green punch of nutrients.
Hippie Hash
Equipment
- Skillet
Ingredients
- 1 lb. frozen shredded hash browns thawed
- 1 medium red onion thinly sliced
- 1 red bell pepper diced
- 1 small zucchini chopped
- 2 cups bite-sized broccoli florets
- 1 cup button mushrooms thinly sliced
- 2 cloves fresh garlic finely minced
- 1 tbsp nutritional yeast
- 1 tbsp extra virgin olive oil
- 1/4 tsp crushed red pepper flakes optional
- 1/2 tsp dried oregano
- Salt and freshly cracked black pepper to taste
- 1 cup reduced-fat feta cheese crumbled (or dairy-free cheese for a vegan option)
Instructions
Step 1: Prep Your Ingredients
- Start by gathering all your ingredients. Chop them up and set them aside. Thaw your hash browns, and make sure they are as dry as possible to get that perfect crunch.
Step 2: Heat the Pan
- In a large skillet, heat the extra virgin olive oil over medium heat. Wait for it to shimmer just a bit—that’s a sign it’s hot enough.
Step 3: Sauté the Aromatics
- Add the minced garlic and sliced onions to the hot oil. Sauté for about 3-4 minutes until the onions turn translucent and the garlic is fragrant. Keep stirring to prevent the garlic from burning.
Step 4: Add the Vegetables
- Next, toss in the diced bell pepper, chopped zucchini, and sliced mushrooms. Cook for another 5-7 minutes. You’re looking for those veggies to soften but still keep some texture.
Step 5: Add Hash Browns
- Time to introduce your thawed hash browns. Spread them evenly across the skillet and allow them to cook undisturbed for about 5 minutes. This helps form that crispy layer we all crave.
Step 6: Mix in Broccoli and Season
- Add the bite-sized broccoli florets. Stir everything together. At this point, sprinkle in your nutritional yeast, oregano, and crushed red pepper flakes if you’re using them. Season with salt and pepper.
Step 7: Cook to Crispy Perfection
- Let it cook for another 5-10 minutes, stirring occasionally, until the hash browns are golden brown and crispy. Make sure that every veggie is integrated well.
Step 8: Serve and Top
- Once golden, remove from heat. Give it a taste; adjust your seasonings if necessary. Serve hot, topping it with crumbled feta cheese or your cheese of choice, and enjoy!
Notes
- Frozen Hash Browns: If you forgot to thaw them, don’t worry! Just add a few minutes to the cooking time.
- Sheet Pan Option: Want an even easier cleanup? Toss everything on a sheet pan and roast in a hot oven for about 20 minutes.
- Freezing: If you make too much, you can freeze the leftovers. Just store them in an airtight container.
- Fresh Herbs: Add a handful of fresh herbs like parsley or basil right before serving for an extra burst of flavor.
- Leftover Stars: This dish shines with leftovers. Add cooked chicken or sausage if desired for a heartier meal.
Nutrition
Frequently Asked Questions
1. Can I make hippie hash ahead of time?
Absolutely! You can prepare it a day ahead. Just cook and store it in the fridge. Reheat it in a skillet when you’re ready to serve.
2. Is hippie hash suitable for meal prepping?
Yes! It’s perfect for meal prep. Make a large batch and portion it out for lunches or quick dinners throughout the week.
3. How can I enhance the flavor of my hippie hash?
Experiment with spices! Adding smoked paprika or cumin can provide an intriguing twist. You can also incorporate some soy sauce for an umami touch.
4. Can I add protein to my hippie hash?
Of course! Feel free to mix in cooked beans, scrambled eggs, or diced tofu for an added protein kick.
5. How spicy is hippie hash?
The spiciness depends on your use of crushed red pepper flakes. You can easily adjust the heat level by adding them to taste.
Conclusion
Embrace this experience with hippie hash. It’s not just a meal; it’s an adventure in your kitchen. With its vibrant flavors, endless customization, and wholesome ingredients, this dish fits perfectly into any meal planning strategy. Whether you’re cleaning out your fridge or hosting friends, hippie hash is your go-to solution. So gather your ingredients, fire up that skillet, and let the aroma take over your kitchen. Enjoy every crunchy, flavorful bite!
Dive into this dish, let it inspire you, and make it your own. Here’s to bellies full of good food and hearts warm with comfort. Happy cooking!