Sharon Brown
Before diving into the succulent world of pepperoncini, let’s consider how to elevate your culinary experience. These tangy peppers pair beautifully with a variety of dishes. For starters, they work wonders in salads, adding an unexpected zing that brightens up the greens.
They also complement hearty Italian meals. Picture a comforting bowl of pasta—add pepperoncini for a delightful kick.
If you’re planning a barbecue, think of them as the perfect topping on grilled burgers or hot dogs. They also shine in sandwiches, imparting vibrant flavor to deli-style subs or veggie wraps. Lastly, don’t overlook their potential to jazz up a cheese platter.
The combination of salty cheese and the slight heat from pepperoncini will surely impress your guests. Now, let’s dive in.

Today, we embark on a tasty journey highlighting a small but mighty ingredient: pepperoncini. These vibrant peppers are not just visually pleasing; they also deliver an exciting flavor punch.
You might have encountered them in salads or served alongside Italian dishes. With their perfect balance of tang and heat, it’s clear they’ve earned a rightful spot in our kitchens.
As a registered dietitian and passionate food blogger, I love discovering ingredients that are not only easy to prepare but also elevate everyday meals.
Today, I’ll share with you everything you need to know about pepperoncini, from how to make a delicious dish to storing it properly. Get ready to savor the world of pepperoncini!
What is Pepperoncini?
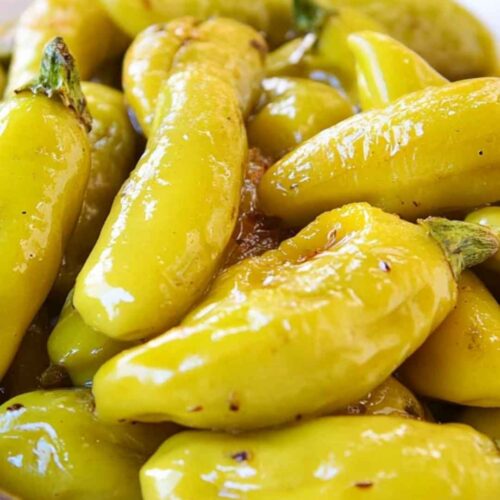
Pepperoncini, also known as Tuscan peppers, hail from Italy. These mild chili peppers are usually green or yellow and are often pickled to enhance their flavor.
They range in heat from mild to medium, typically registering between 100 to 500 Scoville units. Although they can be eaten fresh, pickling is a common way to enjoy them.
These peppers bring a tangy, slightly sweet flavor profile to dishes. They’re low in calories and packed with nutrients, making them a wonderful addition to any healthy diet. You may find them in jars at your local grocery store, often preserved in vinegar and spices.
Their versatility can’t be overstated—they can elevate everything from pasta salads to pizzas, and even savory sandwiches.
What Makes This Recipe Different From Other Pepperoncini Dishes?
What sets this pepperoncini recipe apart is the combination of fresh ingredients and a homemade pickling brine. Many recipes simply call for store-bought varieties, which can lack depth of flavor.
By making your own, you control the ingredients and can customize the flavor to your liking. This approach adds a personal touch that no store-bought jar can match.
Additionally, the zesty Italian dressing in this salad amplifies the flavors of the pepperoncini. It brings a delightful harmony to the dish and perfectly complements the other ingredients.
This blend of homemade brine and lively dressing sets this recipe on a pedestal, turning your typical pepperoncini dish into something extraordinary.
How Does It Taste?
The flavor of pepperoncini is often described as a delightful balance of tanginess with just the right amount of heat. When pickled, their flavor intensifies, making them a staple in many dishes.
They have a bright, crisp texture that adds crunch to salads and sandwiches. Imagine biting into a tangy pepperoncini—as the flavor unfolds, it dances playfully on your taste buds, leaving a refreshing warmth behind.
When combined in an Italian pasta salad, the flavor is even more pronounced. The zesty Italian dressing mingles with the peppers, pulling the taste of the entire dish into a delicious symphony.
You might find that the pepperoncini becomes the star of the show rather than just a supporting actor, transforming an everyday meal into something special.
You’ll Also Like The Following Recipe
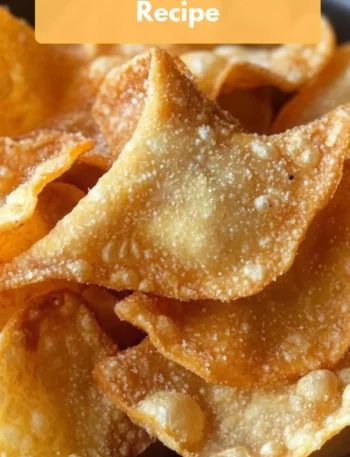
- Fried Wonton Chips
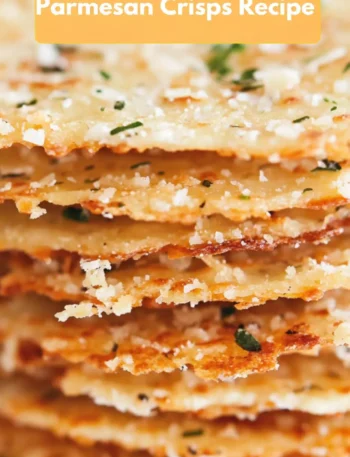
- Barefoot Contessa Parmesan Crisps Tasty Recipe
- Sun Dried Tomato Tea Sandwiches Recipe
Ingredients You’ll Need To Make This Dish
To create a delicious pepperoncini pasta salad, gather the following ingredients:
- 2 cups filtered water
- 2 cups distilled white vinegar
- 1 1/2 pounds fresh pepperoncini or banana peppers, thoroughly washed
- 2 tablespoons pickling salt or kosher salt
- 2 tablespoons granulated cane sugar
- 3 garlic cloves, crushed
- 2 teaspoons whole black peppercorns
- 2 bay leaves
- 1 tablespoon mustard seeds
- 1 teaspoon red pepper flakes
Each ingredient plays a crucial role. The vinegar not only aids in preserving the peppers but also elevates the flavor. The spices and herbs round out the brine, creating a complex flavor profile.

Step by Step Instructions
Step 1: Prepare the Pickling Brine
In a medium-sized saucepan over medium heat, combine the water, vinegar, pickling salt, and granulated sugar. Stir until the salt and sugar dissolve completely, creating a bright solution.
Step 2: Add Aromatics
Once your brine reaches a simmer, introduce the crushed garlic cloves, black peppercorns, bay leaves, mustard seeds, and red pepper flakes. Stir everything together to allow the flavors to meld.
Step 3: Prepare the Peppers
While the brine simmers, wash your pepperoncini thoroughly. If they are large, consider slicing them in half lengthwise or leaving them whole for more substantial bites.
Step 4: Combine Peppers with Brine
Once your brine is fragrant and simmering, remove it from the heat. Add the prepared pepperoncini to the pan, ensuring they are immersed in the brine.
Step 5: Jar Them Up
Transfer the mix into sterilized glass jars, leaving a little space at the top. Ensure the peppers are submerged in the brine. Seal the jars tightly.
Step 6: Let Them Cool
Allow the jars to cool down. For optimal flavor, place them in the refrigerator for at least 24 hours before enjoying—this wait is worth it!
Tips & Tricks On Making Pepperoncini
Here are some helpful tips to make your pepperoncini experience even better:
- Select Fresh Peppers: Always choose firm, blemish-free peppers. Their freshness directly impacts taste.
- Customize Your Brine: Feel free to adjust the spices in your brine to suit your palate. More garlic? You got it! Fewer red pepper flakes? No problem.
- Experiment with Sugar: If you prefer less sweetness, reduce the sugar amount in your brine.
- Temperature Matters: Allowing the brine to cool slightly before adding peppers helps them retain their crisp texture.
- Patience Pays Off: While you can eat them right away, letting them sit improves flavors and creates a more intense pickling experience.
Nutrition Information
pepperoncini nutrition facts

How Do I Store This Dish?
Once your pepperoncini are pickled, they can be stored in the refrigerator effectively for up to two months. The vinegar acts as a preservative and will help maintain their crunch. Just make sure to keep them in a sealed container.

What Other Substitutes Can You Use in Pepperoncini?
If you don’t have pepperoncini on hand or want to switch things up, consider these alternatives:
- Banana Peppers: These have a similar flavor profile and can serve as a great substitute in any recipe.
- Jalapeños: For those who crave more heat, jalapeños can bring the kick you seek. Adjust quantities based on heat tolerance.
- Poblano Peppers: These are milder and will create a different, yet enjoyable flavor experience.
- Cherry Peppers: They offer a sweet, tangy taste that can be delightful in a pasta salad.
- Red Peppers: Sweet red bell peppers won’t provide the heat, but they will bring a nice texture and sweetness to your dish.
Pepperoncini
Equipment
- saucepan
Ingredients
- 2 cups filtered water
- 2 cups distilled white vinegar
- 1 1/2 pounds fresh pepperoncini or banana peppers thoroughly washed
- 2 tablespoons pickling salt or kosher salt
- 2 tablespoons granulated cane sugar
- 3 garlic cloves crushed
- 2 teaspoons whole black peppercorns
- 2 bay leaves
- 1 tablespoon mustard seeds
- 1 teaspoon red pepper flakes
Instructions
Step 1: Prepare the Pickling Brine
- In a medium-sized saucepan over medium heat, combine the water, vinegar, pickling salt, and granulated sugar. Stir until the salt and sugar dissolve completely, creating a bright solution.
Step 2: Add Aromatics
- Once your brine reaches a simmer, introduce the crushed garlic cloves, black peppercorns, bay leaves, mustard seeds, and red pepper flakes. Stir everything together to allow the flavors to meld.
Step 3: Prepare the Peppers
- While the brine simmers, wash your pepperoncini thoroughly. If they are large, consider slicing them in half lengthwise or leaving them whole for more substantial bites.
Step 4: Combine Peppers with Brine
- Once your brine is fragrant and simmering, remove it from the heat. Add the prepared pepperoncini to the pan, ensuring they are immersed in the brine.
Step 5: Jar Them Up
- Transfer the mix into sterilized glass jars, leaving a little space at the top. Ensure the peppers are submerged in the brine. Seal the jars tightly.
Step 6: Let Them Cool
- Allow the jars to cool down. For optimal flavor, place them in the refrigerator for at least 24 hours before enjoying—this wait is worth it!
Video
Notes
- Select Fresh Peppers: Always choose firm, blemish-free peppers. Their freshness directly impacts taste.
- Customize Your Brine: Feel free to adjust the spices in your brine to suit your palate. More garlic? You got it! Fewer red pepper flakes? No problem.
- Experiment with Sugar: If you prefer less sweetness, reduce the sugar amount in your brine.
- Temperature Matters: Allowing the brine to cool slightly before adding peppers helps them retain their crisp texture.
- Patience Pays Off: While you can eat them right away, letting them sit improves flavors and creates a more intense pickling experience.
Nutrition
Frequently Asked Questions
1. Can I eat pepperoncini raw?
Absolutely! Fresh pepperoncini can be added directly to salads, sandwiches, and more. They provide a crispy texture and a delightful burst of flavor.
2. Are pepperoncini spicy?
Most are mild but can range in heat depending on the specific pepper and its ripeness. Typically, they are not spicy at all, making them accessible for a wide audience.
3. Can I reuse the brine?
Yes, the brine can be reused for pickling another batch of peppers or vegetables. However, always consider the first use’s flavors may carry over, so results may vary.
4. How can I prepare a dish using pepperoncini?
Try adding them to pasta salad, pizza, or even grilled meats. Mix them into bean salads or stretch them into a zesty sauce for drizzling.
5. Can pepperoncini be frozen?
Freezing is not the best option due to the potential change in texture. Pickled pepperoncini fare better when stored in the refrigerator.
Conclusion
Pepperoncini is a delightful ingredient that transforms dishes with its zesty flavor and colorful appearance. Whether pickled or fresh, these peppers harmonize beautifully with a variety of meals, making them a versatile staple in any kitchen.
So, fire up your creativity and add some pepperoncini to your next gathering. Whether it’s a pasta salad, a simple sandwich, or a flavorful side, these peppers will leave your guests wanting more.
As you experiment with flavors, don’t forget to embrace the splendid culinary journey that pepperoncini offers. Enjoy your cooking adventures!